

How To Make Font Look Handwritten Photoshop
Sometimes, it'southward but easier to design, draw, or write something on paper. If you don't have a scanner on hand, here's an like shooting fish in a barrel way to learn how to edit handwritten text and bring paw-fatigued elements into Photoshop.
There are a lot of reasons why a designer might want to bring handwriting into Photoshop. Perhaps you drew something on paper and liked information technology then much that yous didn't want to digitally redraw information technology. Perhaps you don't have an iPad or drawing tablet and utilize paper to do calligraphy for designs (like I did for many years). Perchance you want to turn an old scrap of paper into a tattoo. No matter what the reason, it'due south very easy to bring a picture of handwriting into Adobe Photoshop and transform it into an editable design chemical element!
How to Digitize Handwriting
- Write the word, take a picture, and open it in Photoshop.
For this tutorial, I drew the number fifty. I used a normal black sharpie on a piece of loose leaf newspaper. You tin can use whatever drawing tool you want: paint, pen, crayon, marker, etc. Plain white paper is best, merely annihilation will work. Then, accept a uncomplicated photograph with your phone and open it in Photoshop.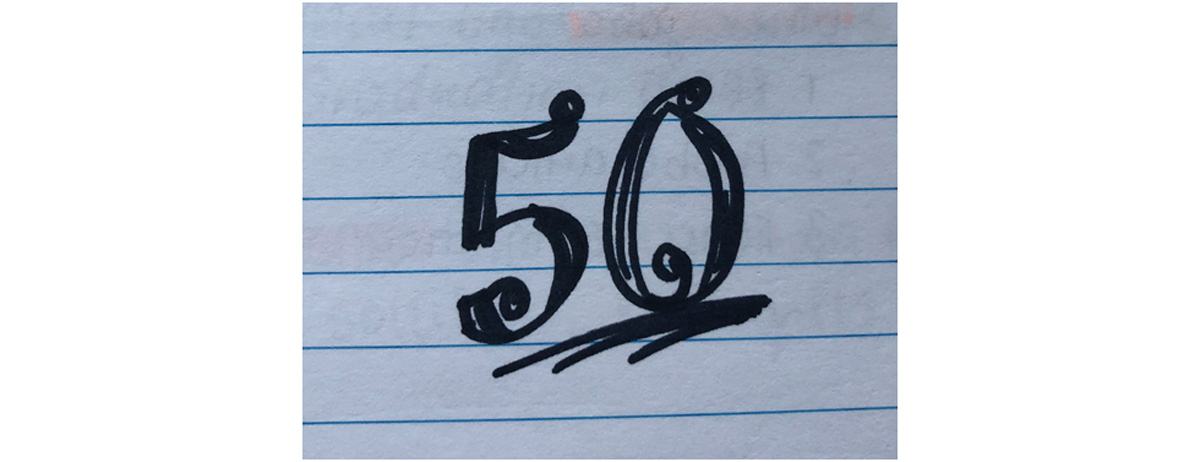
- Employ the levels panel to give it scan-worthy contrast.
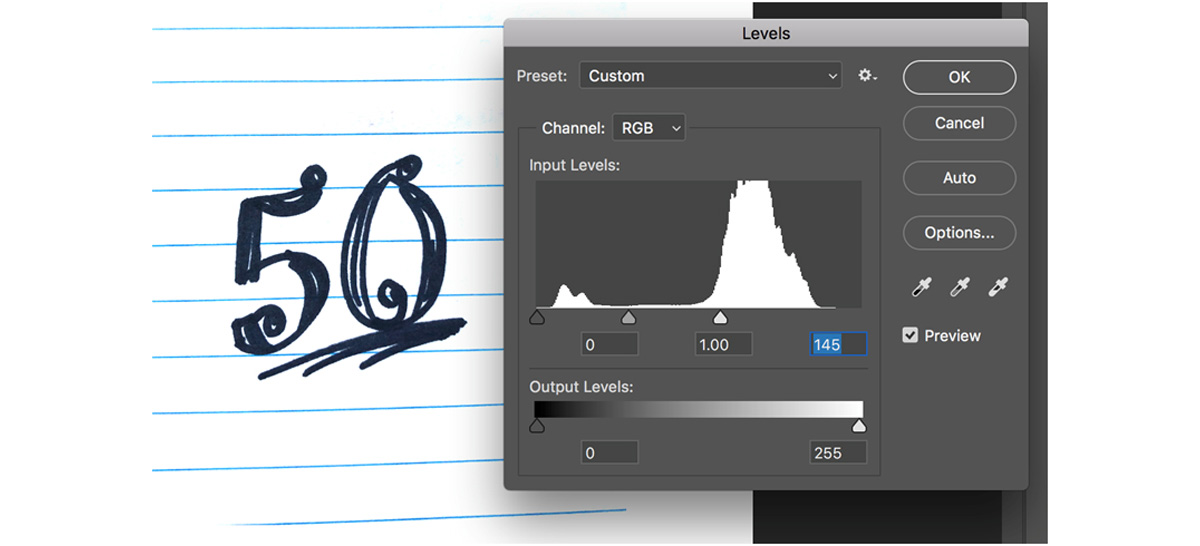
Get-go step: Let's make this image look like we scanned it. Click command + L (ctrl + L on a PC) or become to Image > Adjustments > Levels. Yous should run across a graph of the light in the epitome. A "hill" on the left shows how much black is in the image while a hill on the correct shows how much white is in the image. (Pictures of handwriting usually accept style more than white.)Your goal is to bring the correct-most slider to the first of the "colina" on the correct side of the graph. This will flatten all of the white in the image to be pure white, instead of giving shades of gray. (If y'all used a colored marker instead of black, motility the blackness slider to the farthest point of the black hill to intensify that, too.) You lot should meet your epitome shift from a photograph to a crisp image that looks like you lot scanned it!
- Remove the background using the color range tool and a mask.
If you didn't use loose leaf paper, you can probably skip this step—only you'll still need to practice this if you want the image to have a transparent groundwork! Go to Select > Color Range and click on the writing in your image. Adjust the fuzziness until all you can run across in the preview is your writing (for me, I made sure no loose leaf lines were visible). And then, click the mask button to make the rest of the image transparent. You should only see the digitized handwriting.
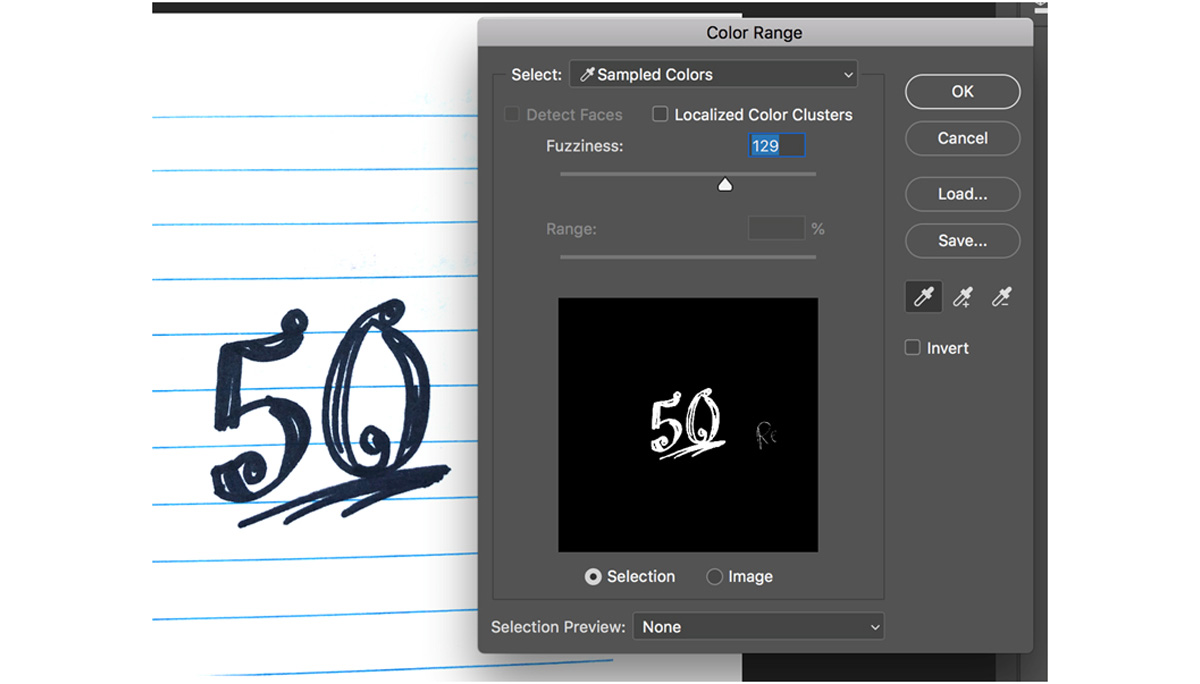
- Color the handwriting using a colorize filter.
If you don't want plain blackness text, you tin can add color! Go to Prototype > Adjustments > Hue/Saturation. In this window, click the box beside the word "colorize." From here, you can choose any color and increase the saturation and lightness until you have colored your handwriting.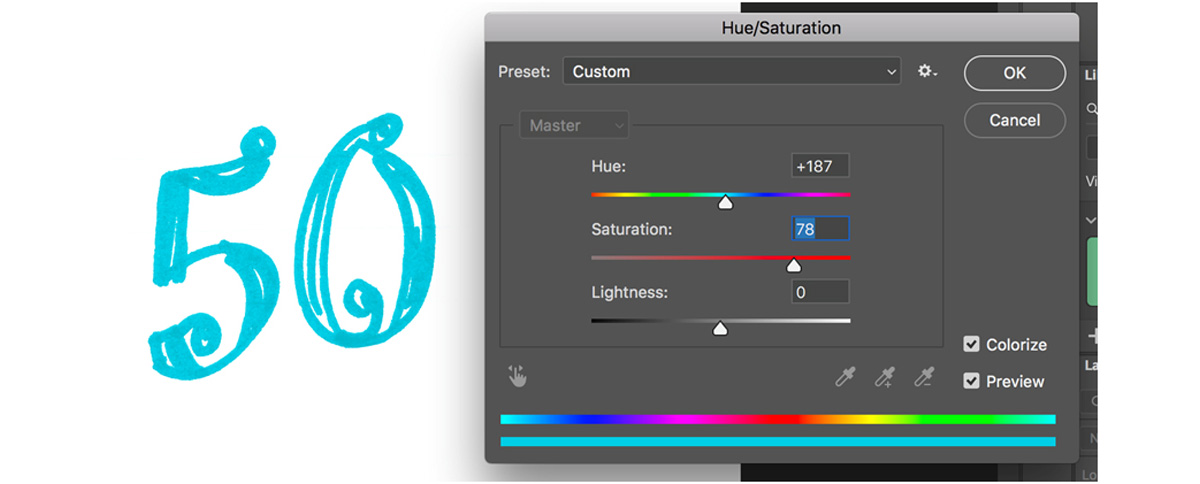
And voila! Here you have an editable photoshop layer for your handwriting. From hither, you tin can save information technology as a .png and use it in other programs, show it to a tattoo artist, or fifty-fifty import it into Illustrator and image trace it to make information technology into a vector. The possibilities are nearly countless—hopefully this tutorial inspires you to utilize your digital handwriting more often in pattern.
Source: https://makeitcenter.adobe.com/en/blog/how-to-digitize-handwriting.html
Posted by: thompsonrearandeas.blogspot.com
0 Response to "How To Make Font Look Handwritten Photoshop"
Post a Comment