

How To Create A Neon Sign In Photoshop
1 blueprint element that'southward certainly trending is the neon glow effect. By incorporating and playing with diverse lighting furnishings, you lot can create emphasize an chemical element of your site or add together some subtle mystery to the overall design. Whether you want to make a literal neon sign or just add a fun pop-culture vibe to your site, this effect is such a fun trend that allows designers to experiment!
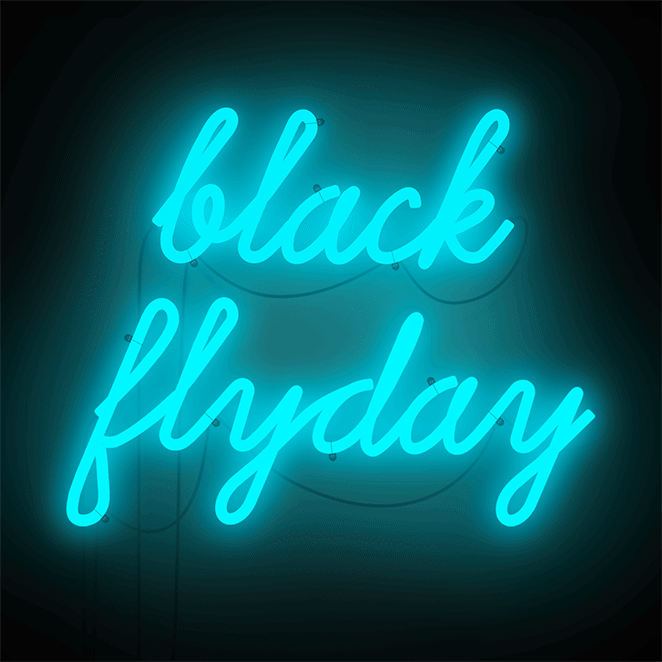
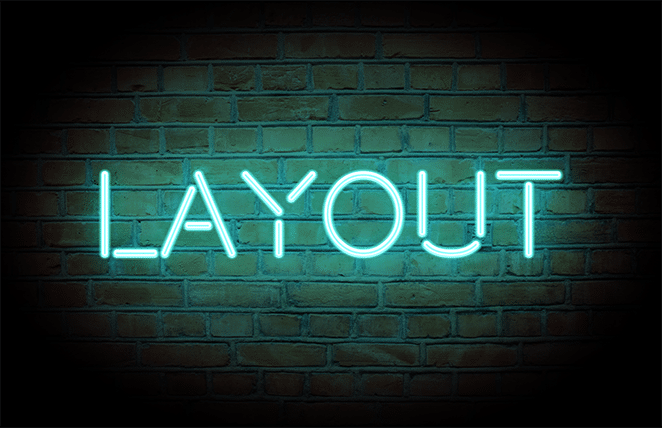
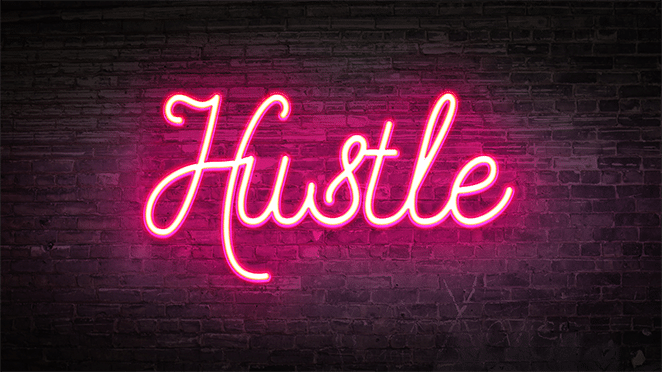
The neon glow outcome can be plant around the spider web in lots of different forms. Some focus on the glowing, neon aspect, while others focus on the "reality" of a virtual neon sign. Here's an example of the realistic approach:
Now that you've seen these neon signs in action, effort information technology out for yourself!
Create a neon glow effect in Photoshop
Before nosotros go started, allow's clarify a few things that will help you lot get the best results. For a realistic upshot, yous'll desire to find a font that either connects or has breaks like a real neon sign would. If yous're using an icon, using a simple outline will look a little cleaner, only feel free to experiment as you lot see fit. Allow us know how it goes!
Create your groundwork
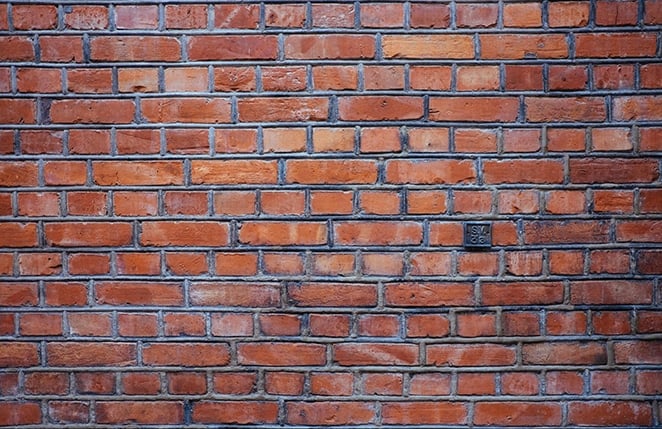
For this example, I'm going to use this brick background from Unsplash. You lot can cull whatever yous like, only this brick gives it a great, realistic feeling of hanging on a wall. And don't worry – we're going to give information technology a dark look to emphasize the glow!
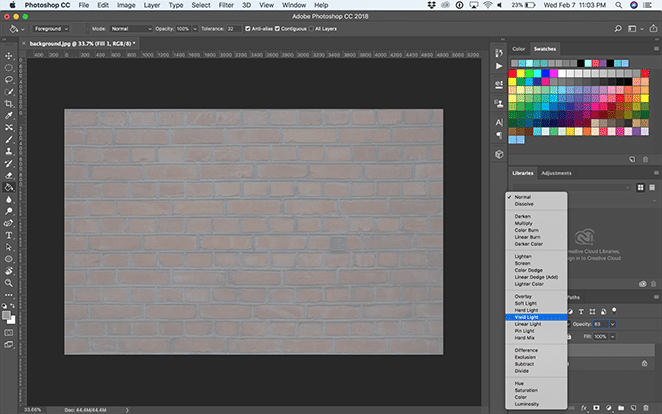
To darken the paradigm, create a new layer nether and fill up information technology with gray using the Pigment Bucket Tool. I'grand using #999999. Then, prepare the opacity to something like 83% and change the blending mode for the image layer to Vivid Low-cal.
Add together dramatic lighting to the background
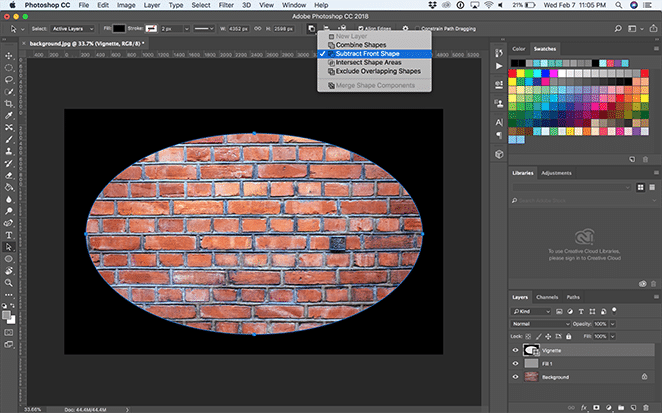
At present we're going to create a vignette. To exercise this, create a new layer, and use the Ellipse Tool to draw an ellipse just slightly smaller than the sail.
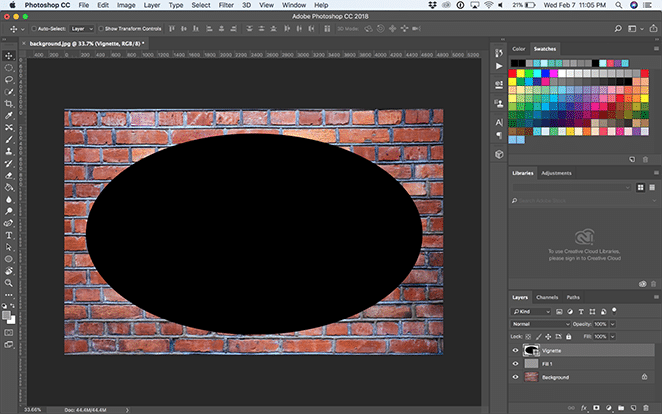
Then, with the Path Selection Tool, select Path Operations dropdown and click Decrease From Shape.
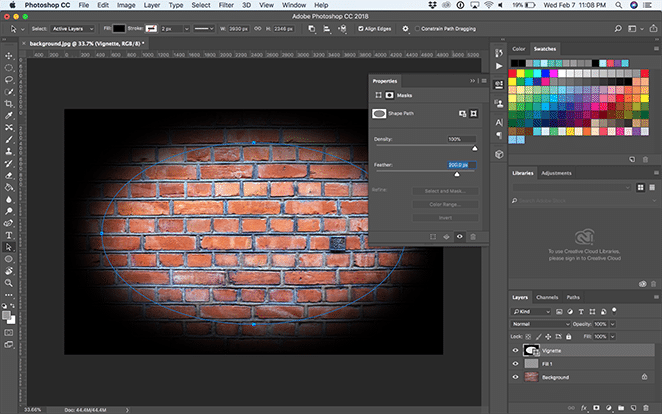
Open the properties window with Window > Properties and select Mask. Then set up Plumage to 200px and adjust it with the Costless Transform Tool as you please. It should look something similar this then:
Create a new layer above the vignette layer with Layer > New Layer and fill it with black using the Pigment Bucket Tool. Then, prepare the opacity to something like 75% and change the blending mode for the layer to Vivid Light.

Create the neon sign
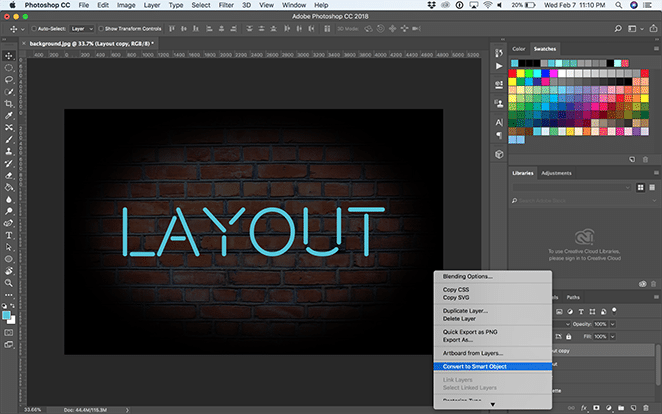
For this case, I'1000 going to use the typeface Beon Medium to spell out "Layout," but you lot tin choose any typeface, phrase, or icon you like! From here, y'all can position your text however you lot similar.
Duplicate the text layer, right click it, and select Catechumen to Smart Object. Then, right click the layer and select Blending Options.
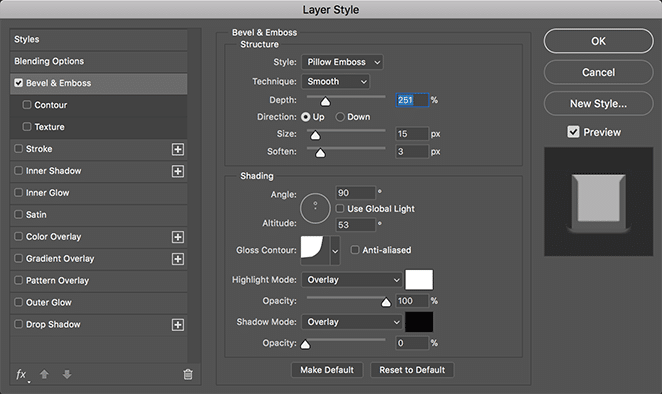
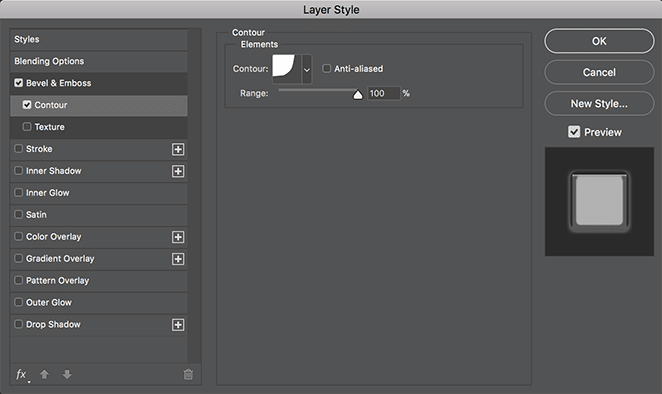
Add a Bevel & Emboss. This gives dimension to the text, so attempt diverse settings to go the result you similar! I'm using these settings:
- Style: Pillow Emboss
- Technique: Shine
- Depth: 251%
- Direction: Upward
- Size: 15px
- Soften: 3px
- Shading bending: ninety degrees
- Distance: 53 degrees
- Gloss Profile: Cove – deep
- Highlight Way: Overlay with white and 100% opacity
- Shadow Mode: Overlay with black and 0% opacity
Next, add a Contour adjustment under Bevel & Emboss, select cove – deep from the dropdown, and leave the range at 100%.
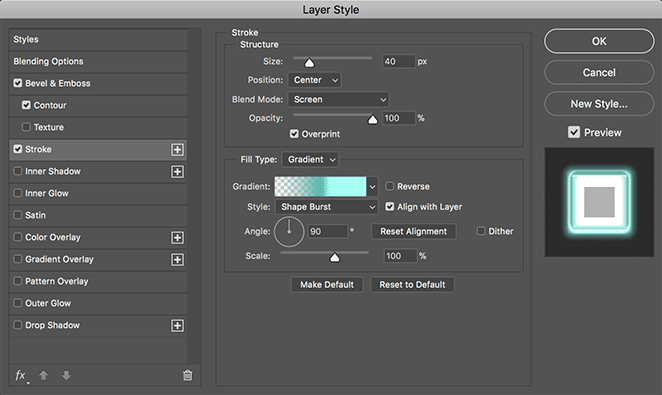
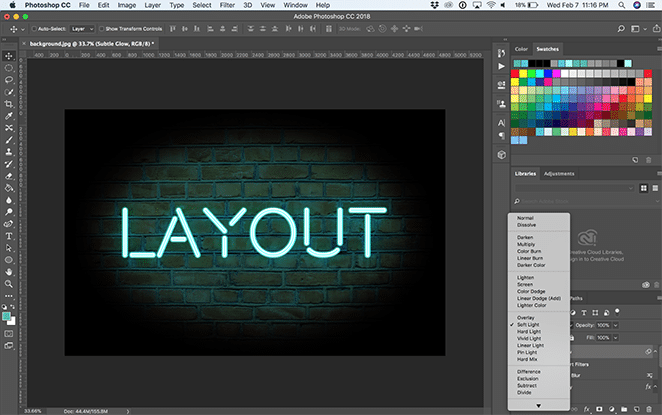
Now add together a Stroke layer. This will create the "glow" of your neon sign and brand information technology look like it's turned on! Here are the settings I'one thousand using:
- Size: twoscore
- Position: Center
- Blend Mode: Screen
- Opacity: 100%
- Overprint: Checked
- Fill type: Gradient
- Style: Shape Burst
- Align with Layer: Checked
- Angle: 90 degrees
- Scale: 100%
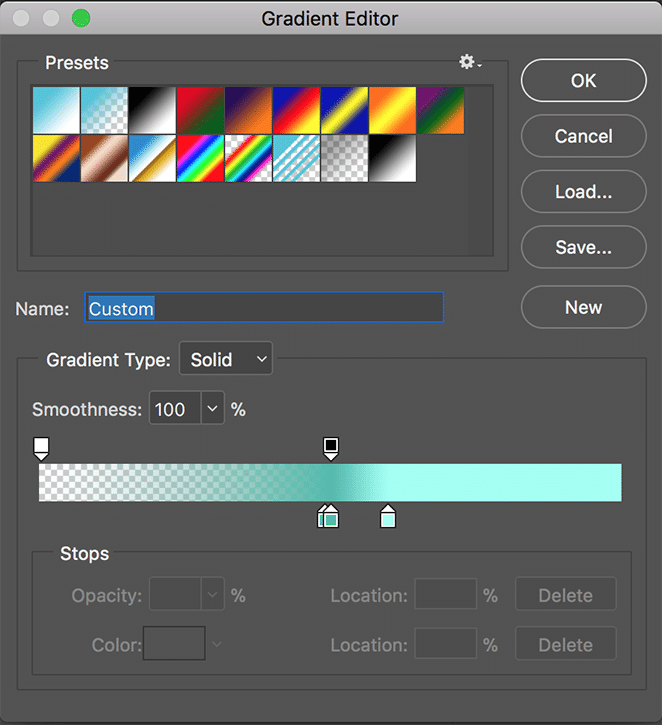
Now let's create your custom gradient by double clicking the color shown in the slope bar. Add a transparent color to the left, a nighttime color toward the center (I used #51bbad), and a lighter blue merely to the right of the darker center color (I used #a1fff3). This will give your glow the perfect depth to brand it look similar the plastic of a existent neon sign.
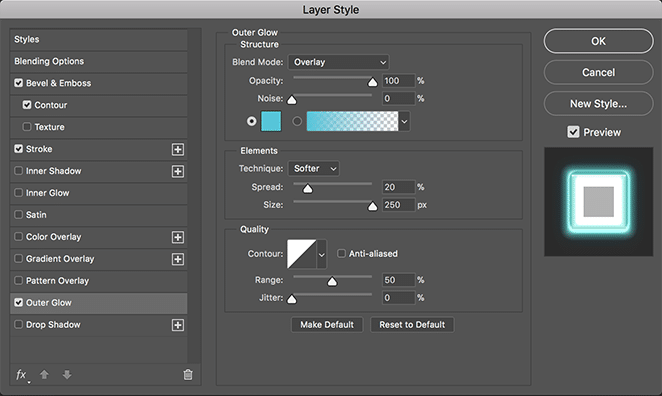
Now let's add an Outer Glow, to create the light the shines off our neon sign. Hither are the settings I'thousand using:
- Alloy Manner: Overlay
- Opacity: 100%
- Noise: 0%
- Technique: Softer
- Spread: 20%
- Size: 250px
- Contour: Linear
- Range: 50%
- Jitter: 0%
And select the same color every bit your text. Again, I'm using #50c4da.
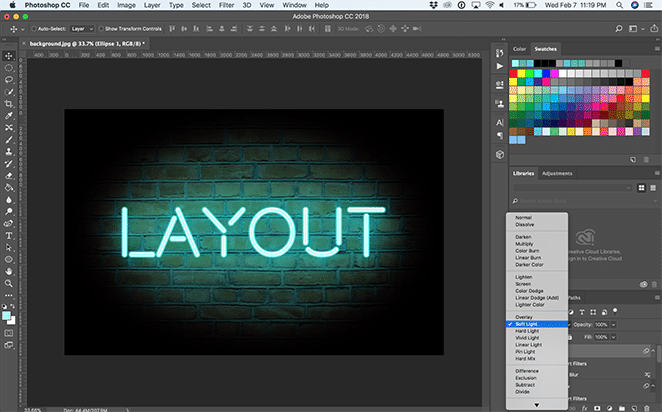
Create a custom gradient lights
To add to the glowing effect, let's create two layers. One with a broad and subtle glow, and some other with a small and concentrated outcome behind the text, to give it a realistic event. First, let's create the larger, subtle glow.
Using the Ellipse Tool, create an ellipse that spans all of the text and almost of the groundwork. Set the color to something slightly darker than the color you chose for your text. I'g using #51bbad. And then, correct click the layer and select Catechumen to Smart Object.
So, with the ellipse layer selected, select Filter > Mistiness > Gaussian Blur.

Set the radius to somewhere around 150 pixels. At present alter the blending options to Soft Light.
Create a new layer to create another ellipse, this time smaller and about the size of the text. Motility it under the text layer only above the other ellipse layer. Again, convert the ellipse to a smart object.
Set the color to something slightly lighter than the text color yous chose. I'm using #a1fff3.
Then, with this new ellipse layer selected, select Filter > Blur > Gaussian Mistiness. Fix the radius to somewhere effectually 150 pixels. Now change the blending options to Soft Calorie-free.
And that's all of it – now you accept a brilliant and shiny neon sign! How will you use this effect? Take any other favorite examples? Allow us know in the comments.
How to use the Photoshop templates
Download the templates for free below!
Toggle the backgrounds
In these files, there are diverse backgrounds you tin can toggle on and off with the layer visibility buttons or move under and above each other in the layers panel. Option your favorite or add together your ain background into a new layer. If you add together a custom background, just resize it however you lot like!
Edit the text
To edit the text, open up the "On" binder and double click the "On – Double click to edit text" layer.
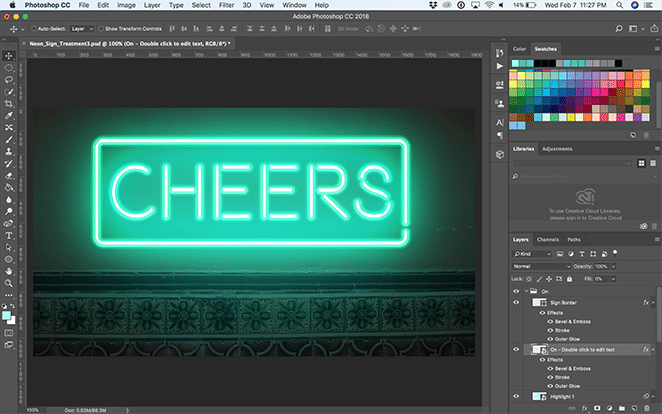
This will pull upward some other Photoshop certificate where you can utilize the Text Tool to edit the text or conform the font. The primal here is to resize the text to fit within the given expanse. (Anything outside of the premises will not carry over to the primary file!) Yous tin exercise this past selecting Edit > Free Transform or Command + T on a Mac (Control + T on a PC). When you're happy with it, save and close the smart object or Photoshop tab.
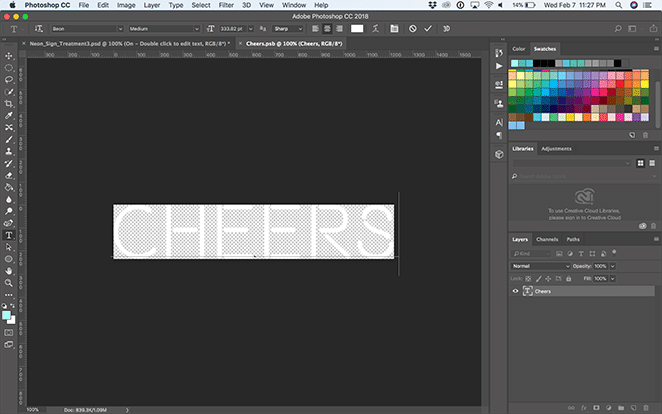
Notation: The "On" and "Off" layers are synced, so when you edit the smart text in one, it'll update in the other. Pretty sweet, right?!
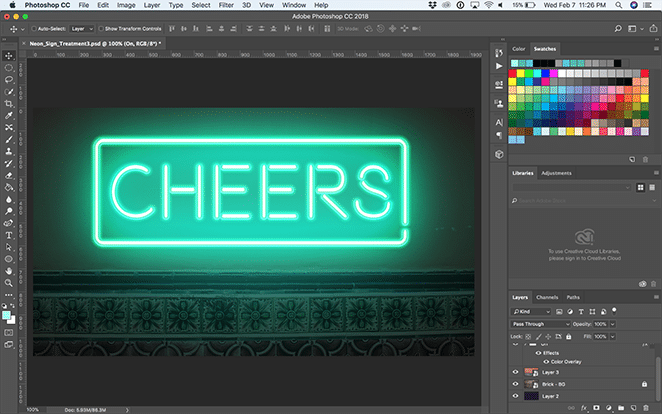
Adjust actress pieces
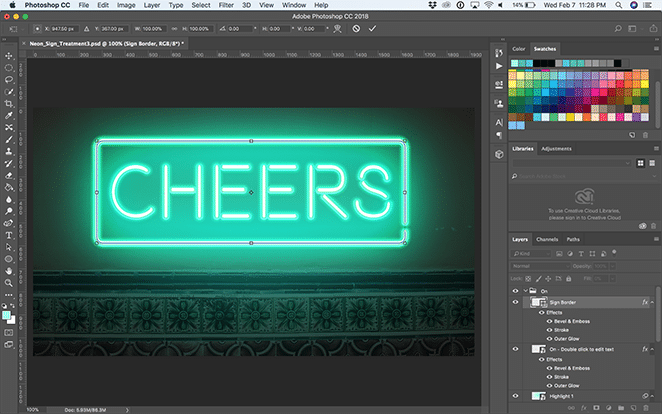
Depending on which effect you choose, y'all may take to adapt the outer foursquare or line. If you're using "Neon_Sign_Treatment2," yous tin can condone this section. For "Neon_Sign_Treatment3," if you find yourself needing to arrange the box, merely open the dropdown for "On" and "Off." From hither, you're able to transform the Sign Border layer by selecting Edit > Free Transform or Control + T on a Mac (Command + T on a PC). The key is to suit both the "On" and "Off" Sign Border layers equally.
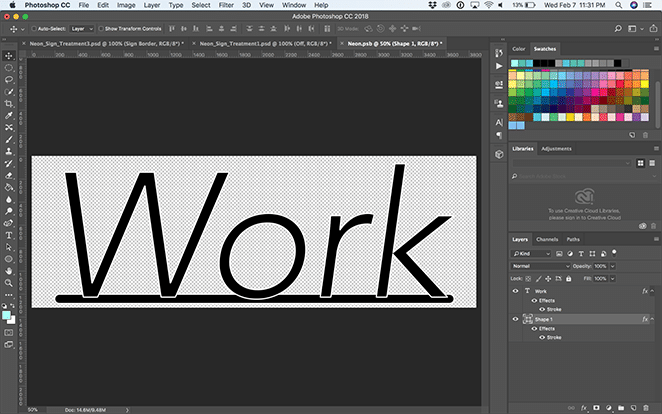
For "Neon_Sign_Treatment1," you may want to accommodate the line below the text. To do that, open up the "On" binder and double click the "On – Double click to edit text" layer. Here you tin can adjust the line and then it touches the bottom of your text. Once again, if you update it from the "On" layer, it'll also update within the "Off" layer. (And vice versa!)
If yous would like to alter the "Cords" layer in "Neon_Sign_Treatment1," select the layer and, using the Directly Selection Tool, click the individual points and drag them around. You can fifty-fifty add or subtract specific points in the line using the Pen Tool, Add Anchor Point Tool, and Subtract Ballast Betoken Tool. And if the arch of the cord isn't how you lot like it, just employ the Convert Bespeak Tool until you're happy with the results.
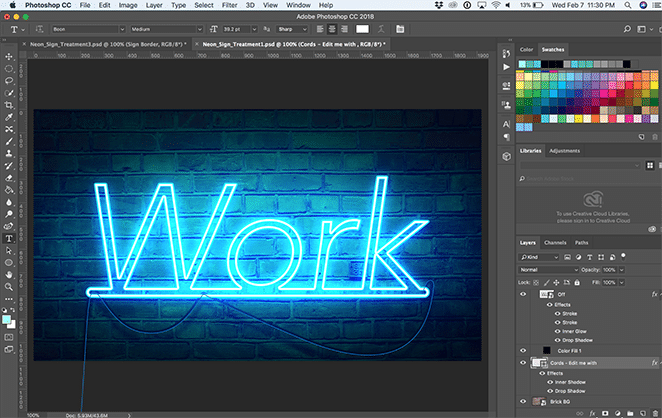
If you need to adjust the glow later moving effectually the diverse objects, simply open the "On" folder and select the "Highlight" layers. From here, you can drag them around using the Motility Tool or shrink and abound them with Edit > Gratuitous Transform.
At present you have the perfect, easy-to-use tool to create your own neon glow furnishings. Take fun designing!
Download the gratuitous templates!
Want to download the templates used above? Click beneath to get started!
Ready for more inspiration?

Learn what the pinnacle pattern trends are here.

How To Create A Neon Sign In Photoshop,
Source: https://getflywheel.com/layout/neon-glow-effect-photoshop-how-to-tutorial/
Posted by: thompsonrearandeas.blogspot.com
0 Response to "How To Create A Neon Sign In Photoshop"
Post a Comment